
You can tell the fixed centre, edge-centres and corner-centres apart, and you know what a wide turn is.
Begin with white on top. Once the white centre is complete, turn the cube so white is on the bottom while you build yellow on top.
1. Use the fixed middle sticker
Unlike the 4×4, the 5×5 tells you where each centre belongs. The nine interior stickers of a face must all match its fixed centre. Edges and corners around the outside can stay scrambled during this stage.
The four edge-centres sit directly above, below, left, and right of the fixed centre. The four corner-centres sit diagonally from it. A turn cannot change one type into the other.
2. Build the middle bar
Hold white up. Find two white edge-centres and move them to opposite sides of the fixed white centre, making a 1×3 bar. Use face turns to put an incoming piece in the path of the relevant slice before bringing it onto U.
The middle bar has an edge-centre at each end and the fixed centre in the middle. Neither end can take a diagonal corner-centre.
3. Add the outer bars
Each outer bar has a white edge-centre between two white corner-centres. Line up the three pieces in a row or column on a working face, align the bar with the open column on U and insert it with a wide turn.
Turn the target face to move finished bars out of the slice you’ll use for the next insertion. Before making a wide turn, check where it will move the existing bar. While you build the first white centre, there are no other completed colours to protect.
4. Protect opposite and neighbouring centres
Hold the cube with the white centre on the bottom and build yellow on U. If a wide turn brings in yellow pieces and displaces part of the white centre, turn U to move the new yellow pieces out of the slice’s return path. Then undo the wide turn to restore the white centre.
Once the white and yellow centres are complete, hold them on the left and right. Build the side centres around their fixed middle stickers, using the same method of building bars and restoring the slice after each insertion. A face turn can rotate a finished block safely. If you turn a slice through it, restore the slice afterwards.
5. Finish the final two centres
Put the unfinished centres at U and F. Work with the colour of the fixed sticker on U. Finish the middle bar first, then build each outer bar using the remaining edge-centres and diagonal corner-centres of that colour.
Keep a completed bar out of the slice you’re about to turn. Line up and insert the incoming pieces, move them out of the slice’s return path, then undo the slice turn. If the pieces are in the wrong arrangement, use these steps to move one into a useful row or column before building the bar. Once U is complete, the remaining pieces fill F.
The worked example shows one insertion. It shows how to use a slice to move centre pieces, move the new pieces out of the way and restore the slice. The bars on your own cube determine how to set up the insertion and which slice to turn.
Watch, then try
Work through an example
Start by stepping through one move at a time. This prepared example shows a specific action. Use the lesson’s setup instructions to recognise when to use it on your own scramble.
Watch one worked example
Watch the inner centre pieces during Rw, U, Rw′. The final move restores the displaced column and leaves the newly positioned pieces in place. Use the cube nets to inspect the centres you can’t see in the 3D view.
Example grip: Start with yellow on top, blue at the front and red on the right. Follow any written instructions for rotating the whole cube.
0 / 3
Loading 3D cube…
Prepared position · 0 / 3 moves
Use Next move to follow the sequence.
Drag to inspect other faces. Use the arrow keys to rotate the view when the cube has keyboard focus.
Copy this exact example on your own cube
Start with a solved 5×5, with yellow on top and blue at the front. Apply the setup moves below from left to right to create the example’s starting position. Keep this separate from the scramble you’re solving throughout the course.
Rw U' Rw'Then follow the lesson sequence. If your cube has a different colour scheme, use the relationships between your own colours to identify the equivalent pieces.
Compare the starting position and the result
Drag each cube to inspect its other faces.
Explain it to yourself
Check your understanding
Now use your own cube
Your turn
Build the middle white bar through the fixed centre, then build the two outer bars. Repeat for the other centres, restoring completed blocks after each insertion.
Open a 5×5 Digital Cube for practiceOpens in a new tab so you can keep this lesson open while you practise. Check for yourself whether you’ve met the lesson goal. The Digital Cube doesn’t assess your result.
If you get stuck
A piece will not fit the centre position I chose.
Check which orbit the piece belongs to. Edge-centres form a cross around the fixed centre, and corner-centres sit diagonally from it. Find a piece of the correct type.
I’m breaking up the white centre while building the yellow centre.
Restore the wide slice after the insertion. Move the new yellow pieces out of the way, undo the insertion turn and check the white centre before continuing.
Before moving on
Check your result
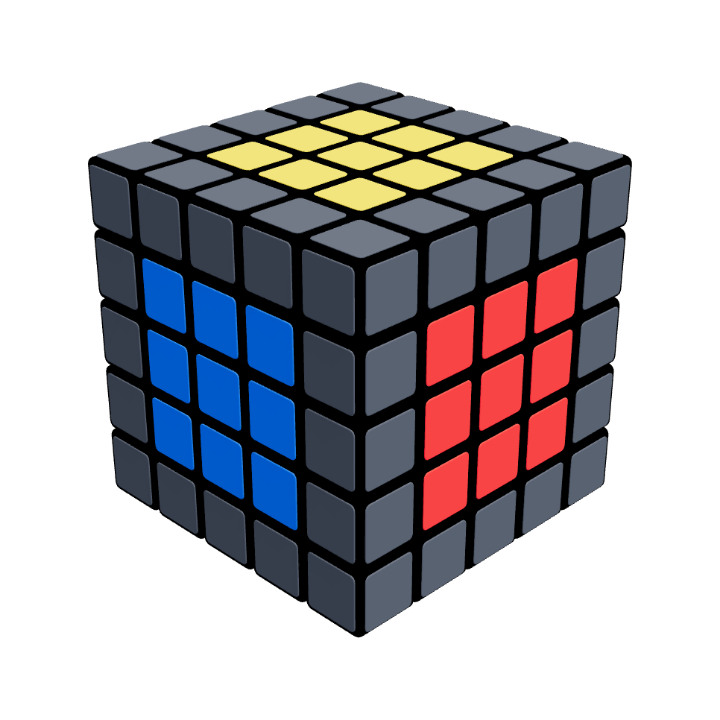
Your cube at this stage
Six centre blocks complete
All nine stickers in each centre block match its fixed middle sticker. The edge pieces still need grouping.
Confirm these on your cube. Watching the animation alone does not complete the lesson.
Tick each item once you can do it yourself.