You can solve the beginner last layer and have a yellow cross.
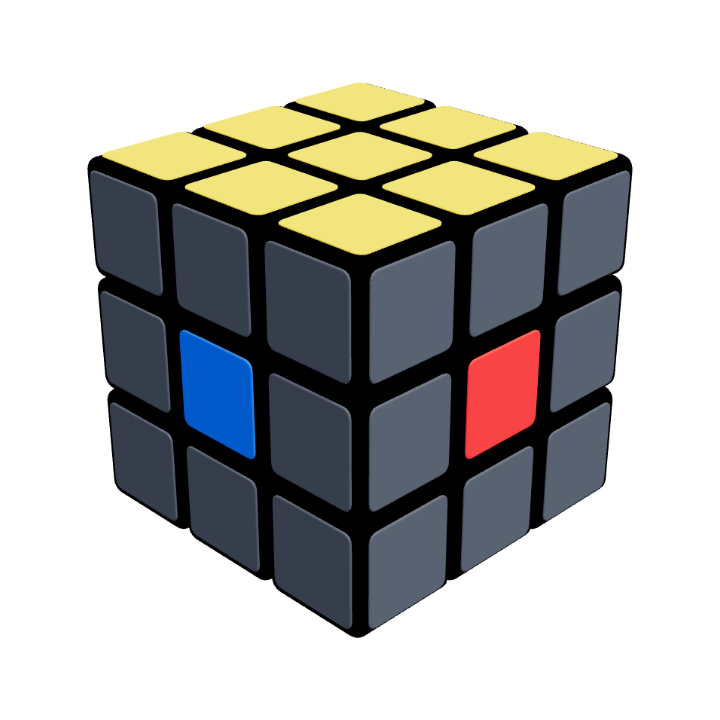
Yellow up. The one yellow-up corner is at top-front-left; the front-right corner has yellow facing front.
1. Understand what this case teaches
OLL means orienting the last layer: making the whole top one color. You already do this as a yellow cross followed by corner twisting. This lesson adds one faster corner case after the cross is complete.
Do not apply Sune to every mixed yellow face. The recognition and orientation below are part of the algorithm.
2. Check both identifying stickers
First make sure all four yellow edges face up and the first two layers are solved. Then inspect the corners:
- Exactly one corner has yellow facing up. Hold it at top-front-left.
- The corner at top-front-right has its yellow sticker facing front.
The second condition distinguishes this case from a similar-looking opposite twist. Compare both conditions with the starting net below before turning.
3. Apply Sune
R U R' U R U2 R'
Perform all seven moves from the same grip. In the correctly set up case, the top becomes yellow and the first two layers remain solved. Top side colors may still need permutation afterward.
4. Use a familiar fallback for other cases
If your top does not match these conditions, use the beginner yellow-corner method. Learning Sune does not require memorizing all last-layer orientation cases at once.
After the yellow face is complete, position the corners and edges with your existing method. The next optional lesson focuses on recognizing the final edge cycle.
Watch, then try
Work through an example
Use one move at a time first. This prepared case teaches a specific action; use the lesson’s setup instructions to recognize when it applies to your own scramble.
Watch one worked example
Locate the sole yellow-up corner at front-left and yellow facing front on the front-right corner. Sune orients those corners in seven moves.
Example grip: yellow up · blue front · red right at the start. Follow any written whole-cube rotations.
0 / 7
Loading 3D cube…
Prepared position · 0 / 7 moves
Use Next move to follow the sequence.
Drag to inspect other faces. Arrow keys rotate the view when the cube is focused.
Copy this exact example on your own cube
Start with a solved 3×3, yellow up and blue front. Apply the setup below from left to right. This creates the example’s starting position. Keep this separate from the ongoing scramble you are solving through the course.
R U2 R' U' R U' R'Then follow the lesson sequence. If your cube’s color scheme differs, match the piece relationships using your own colors.
Compare the starting position and the result
Drag each cube to inspect its other faces.
Explain it to yourself
Check your understanding
Now use your own cube
Your turn
Copy the prepared setup on a solved cube, identify both recognition features, then perform Sune. Repeat from a different viewing angle after restoring the same setup.
Open a 3×3 Digital Cube for practiceOpens in a new tab so you can keep this lesson beside your practice. Check the lesson goal yourself; the Digital Cube does not grade it.
If you get stuck
I see one yellow-up corner but Sune does not finish.
Also check the yellow sticker on the front-right corner: it must face front for this setup. One yellow-up corner alone does not fully identify the case.
Before moving on
Check your result
Your cube at this stage
Last-layer orientation complete
The top is yellow and the first two layers are solved. Finish positioning the top pieces next.
Confirm these on your cube. Watching the animation alone does not complete the lesson.
Check every item when you can do it yourself.