Eight complete edges are stored in U and D, four unpaired groups remain in the middle, and centers are restored.
Place the two groups you are working on at FL and FR.
1. Find a useful partial match
Inspect the four remaining groups. Look for a wing already matching its neighboring midge. Find the missing wing with the same two colors in another group. Use outer setup turns to put those groups at FL and FR.
If there is no partial match, use the slice–flip–slice-back operation on two unpaired groups to rearrange wings and create one. Inspect the new state before choosing another operation.
2. Set up the wing exchange
Choose the upper working slice. Arrange the groups so Uw carries the selected FL wing into FR. The FR flip then changes which wing will travel back when the slice is restored.
Use the FR flip to change a group’s orientation when the front colors form the wrong matching or checkerboard pattern. Compare both sides of the starting net below; a match on just one visible sticker is not enough to choose the setup.
For a lower-slice case, rotate the whole cube to bring that slice to the top working position, then identify FL and FR again. Do not silently change Uw into a different-width move.
3. Slice, flip, slice back
Uw R U R' F R' F' R Uw'
Break this into three actions:
- Uw: transfer the selected upper-band wing toward FR.
- R U R′ F R′ F′ R: flip the whole FR group.
- Uw′: return the center rows and exchange the selected wings.
The sequence changes which wing returns with the slice. On a matched setup it improves the edge grouping without leaving the centers mixed. Finish the full sequence before judging the result.
4. Reinspect rather than repeating blindly
Check which groups now contain all three matching pieces. Protect those groups and work on the remaining unpaired ones. A new partial match may need a new setup or a flip before the next operation.
Continue until eleven edges are complete. If the last group also matches on both faces, pairing is finished. Otherwise compare it with the parity case in the next lesson.
5. Separate a last-edge mismatch from general pairing
The final repair applies when eleven groups are complete and the last group’s two wings are reversed relative to its midge. If several groups still contain different color pairs, stay with ordinary pairing. A parity sequence does not replace the missing setup work.
Need a reminder of the move notation?
R right · L left · U top · D bottom · F front · B back. A plain letter is 90° clockwise looking directly at that face. An apostrophe (′) reverses it; 2 means 180°. Keep the front fixed during an algorithm.
Rw turns the rightmost two layers together. 2R turns only the second layer from the right. 3Rw turns three layers. x rotates the whole cube like R, so the old front becomes the new top.
Watch, then try
Work through an example
Use one move at a time first. This prepared case teaches a specific action; use the lesson’s setup instructions to recognize when it applies to your own scramble.
Watch one worked example
A prepared upper-band wing exchange. Inspect all three stickers on both sides of FL and FR, then watch slice, flip, and slice-back. On your own cube, set up the same relationship before applying this version.
Example grip: yellow up · blue front · red right at the start. Follow any written whole-cube rotations.
0 / 9
Loading 3D cube…
Prepared position · 0 / 9 moves
Use Next move to follow the sequence.
Drag to inspect other faces. Arrow keys rotate the view when the cube is focused.
Copy this exact example on your own cube
Start with a solved 5×5, yellow up and blue front. Apply the setup below from left to right. This creates the example’s starting position. Keep this separate from the ongoing scramble you are solving through the course.
Uw R' F R F' R U' R' Uw'Then follow the lesson sequence. If your cube’s color scheme differs, match the piece relationships using your own colors.
Compare the starting position and the result
Drag each cube to inspect its other faces.
Explain it to yourself
Check your understanding
Now use your own cube
Your turn
Find a partial wing–midge match and its missing wing. Compare both colors with the prepared case, exchange the required wings, and inspect all remaining groups after every operation.
Open a 5×5 Digital Cube for practiceOpens in a new tab so you can keep this lesson beside your practice. Check the lesson goal yourself; the Digital Cube does not grade it.
If you get stuck
The same sequence keeps undoing my progress.
Reidentify the partial match and missing wing after every complete operation. Repeating from an unchanged grip can reverse a useful exchange.
More than one group is still mismatched.
Continue pairing those groups. The next parity lesson assumes eleven complete edges and one specific reversed-wing group.
Before moving on
Check your result
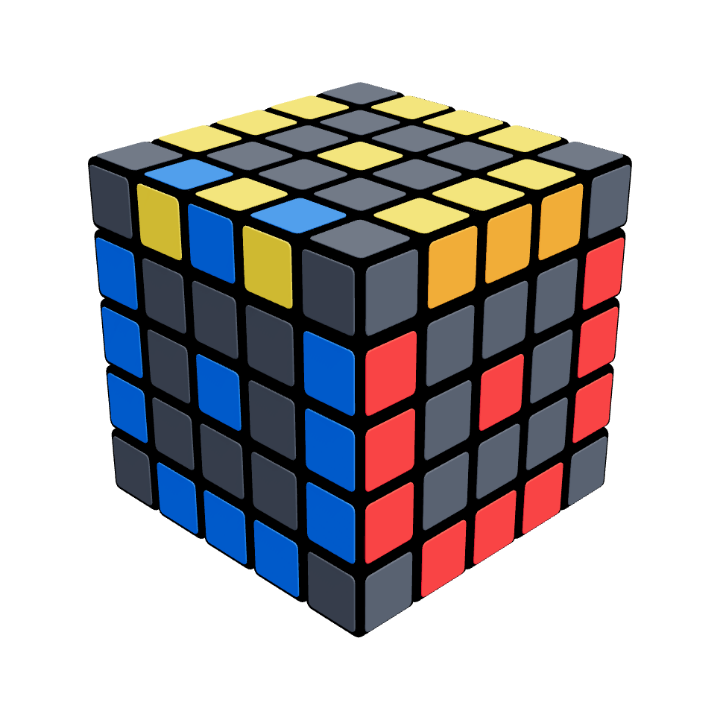
Your cube at this stage
Eleven edges complete
Eleven groups match. The final top-front group has reversed wings around its midge in this example; repair that case next if it occurs.
Confirm these on your cube. Watching the animation alone does not complete the lesson.
Check every item when you can do it yourself.