You can solve a 3×3 using the beginner method.
Inspect the cube from every side before choosing a front.
1. Build a simpler puzzle inside this one
Reduction means grouping the extra pieces so that the whole cube behaves like a 3×3. First build six solid 2×2 centers. Then join the matching edge pieces into twelve complete groups. Finally solve using only outer face turns.
A grouped edge does not need to be in its final position yet. Pairing prepares a unit that the 3×3 method can move later.
2. Know which pieces can trade places
Each center block contains four movable center pieces. There is no fixed middle sticker to tell you its color. Each edge contains two wing pieces, and the eight corners provide a reference for the color scheme.
A wing has two colors. Read both before deciding it belongs with another piece. Two wings make a complete 4×4 edge.
3. Keep the solving stages separate
| Stage | Finish this before continuing |
|---|---|
| Centers | Six uniform blocks in the correct color order |
| Edges | Twelve complete two-piece groups, with centers restored |
| Reduced solve | Use the 3×3 method with outer turns |
During the reduced solve you may encounter a flipped edge group (OLL parity) or two exchanged edge groups (PLL parity). We will learn when to recognize and repair each, after learning the reduced solve.
4. Check your prerequisite
You should be comfortable solving the white cross, first layer, middle layer, and last layer on a 3×3. If those steps are new, start with the 3×3 course. This course teaches the extra work on the larger cube and provides links back to each shared solving stage.
Watch, then try
Work through an example
Use one move at a time first. This prepared case teaches a specific action; use the lesson’s setup instructions to recognize when it applies to your own scramble.
Watch one worked example
Watch a two-layer wide turn and its inverse. It moves some of the interior center pieces as well as the outer layer, unlike an ordinary 3×3 face turn.
Example grip: yellow up · blue front · red right at the start. Follow any written whole-cube rotations.
0 / 2
Loading 3D cube…
Prepared position · 0 / 2 moves
Use Next move to follow the sequence.
Drag to inspect other faces. Arrow keys rotate the view when the cube is focused.
Copy this exact example on your own cube
Start with a solved 4×4, yellow up and blue front. Apply the setup below from left to right. This creates the example’s starting position. Keep this separate from the ongoing scramble you are solving through the course.
R U R' F2 D L2 B U2 Rw U FwThen follow the lesson sequence. If your cube’s color scheme differs, match the piece relationships using your own colors.
Compare the starting position and the result
Drag each cube to inspect its other faces.
Explain it to yourself
Check your understanding
Now use your own cube
Your turn
Find one 2×2 center area and one two-piece edge. Count the pieces in each. Review the 3×3 path if you cannot yet complete a 3×3 solve.
Open a 4×4 Digital Cube for practiceOpens in a new tab so you can keep this lesson beside your practice. Check the lesson goal yourself; the Digital Cube does not grade it.
If you get stuck
I am trying to solve a white face before grouping edges.
Begin with center blocks only. Pair the edges next. The white cross and corners come during the reduced 3×3 solve.
Before moving on
Check your result
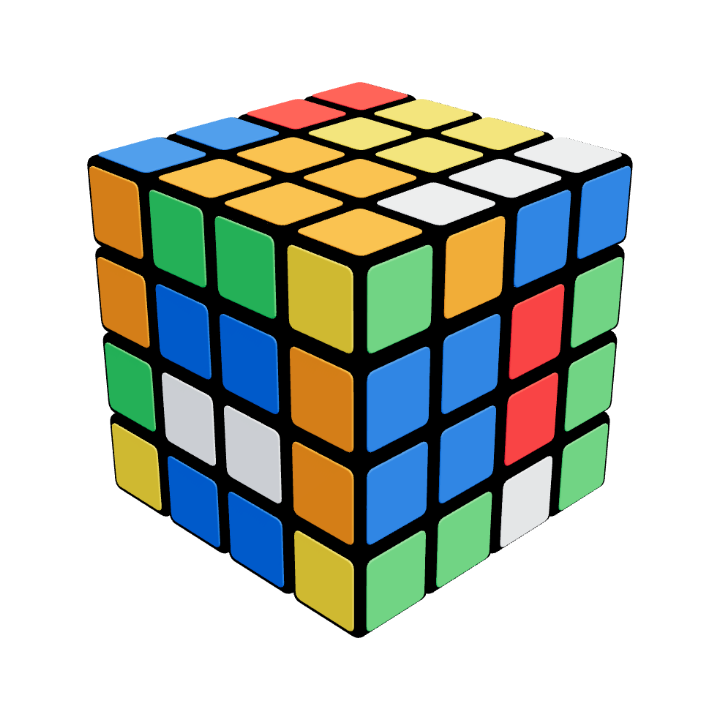
Preparation · no solving yet
Identify centers and wings
Recognize the movable 2×2 center blocks and the two wings in each edge. Nothing needs to be solved yet.
Confirm these on your cube. Watching the animation alone does not complete the lesson.
Check every item when you can do it yourself.