
All six centres are solved and in the correct order.
Use front-left (FL) and front-right (FR) as the working edge positions.
1. Find both wings of one edge
For example, both white-blue wings belong together. Both colours must match, including the second colour as well as white.
Use outer turns to bring the selected wings to the FL and FR edge positions. These are the vertical edges beside the front centre. Outer turns move groups between slots without splitting their wings or mixing centre colours.
2. Place the wings in opposite horizontal slices
Choose the upper wing at FL and the lower wing at FR, or use the mirrored arrangement. Position them so their front-facing stickers are the same colour. A wide U turn can move an upper wing across while the lower wing stays in place, forming a pair.
Before you turn the slice, work out which wing Uw or Uw′ will bring into FR. Check both stickers before choosing the direction that brings the intended wing into FR.
3. Join, store, and restore
- Use the chosen wide U turn to join the matching wings at FR. The centres may look mixed temporarily.
- Lift the completed FR group out of the working slice with
R U R'orR U' R'. Choose the direction of U so an unpaired group from the top layer takes its place at FR. - Reverse the exact wide turn from step 1. This restores the centres while the completed pair stays stored outside that slice.
Repeat. Use outer turns to move completed groups to U or D and to bring unpaired groups into the working positions. If the replacement group is already paired, choose another one; otherwise you may split your finished work.
4. Reorient a working group when needed
R U R' F R' F' R
This flips the FR group as a unit. It changes which wing is on top and which way the two colours face. The centre colours stay intact. Use this flip to set up the working wings before slicing. A flipped last-layer edge needs a separate repair.
5. Finish the last two pairs
Place the two remaining unpaired groups at FL and FR. Put the wings with matching colours in the same horizontal slice. If they’re in opposite slices, use the FR flip above. Now slice the selected wing from FL towards FR, perform the FR flip and undo the slice.
For the prepared upper-slice case below, that is Uw, then R U R' F R' F' R, then Uw'. The flip changes which wing returns, allowing both pairs to form. Match your setup to both visible colours in the example before using that exact version.
If either pair is still mixed, inspect the other colour and adjust the working group’s orientation before retrying. Finish with twelve full pairs and six solid centres. Pairs do not need to be in their final solved locations yet.
Watch, then try
Work through an example
Start by stepping through the example one move at a time. This example demonstrates a specific action. Use the lesson’s setup instructions to recognise when that action applies to your own scramble.
Watch one worked example
For the last two pairs, do Uw, then the seven-move FR flip, then Uw′. The starting and ending nets show both colours of each wing. Reversing the slice restores the centres and swaps the selected wings.
Example grip: yellow up · blue front · red right at the start. Follow any written whole-cube rotations.
0 / 9
Loading 3D cube…
Prepared position · 0 / 9 moves
Use Next move to follow the sequence.
Drag to inspect other faces. When the cube has focus, use the arrow keys to rotate the view.
Copy this exact example on your own cube
Start with a solved 4×4, with yellow on top and blue at the front. Apply the setup moves below from left to right. This gives you the starting position for the example. Keep this separate from the scramble you’re solving throughout the course.
Uw R' F R F' R U' R' Uw'Then follow the lesson sequence. If your cube has a different colour scheme, use your own colours to identify the corresponding pieces.
Compare the starting position and the result
Drag each cube to inspect its other faces.
Explain it to yourself
Check your understanding
Now use your own cube
Your turn
Find two wings with the same two colours. Join them, move the completed group out of the working slice, then restore the slice. Count the completed groups, checking both faces of each one.
Open a 4×4 Digital Cube for practiceThe Digital Cube opens in a new tab so you can keep this lesson open while you practise. Check for yourself whether you’ve met the lesson goal, as the Digital Cube doesn’t assess your result.
If you get stuck
A completed edge splits when I restore the slice.
Store it outside the active horizontal slice first and bring an unpaired group into its place.
The final two pairs are still mismatched.
Check that the matching wings are in the same horizontal slice before slice–flip–slice-back, and compare both outward-facing colours with the example.
Before moving on
Check your result
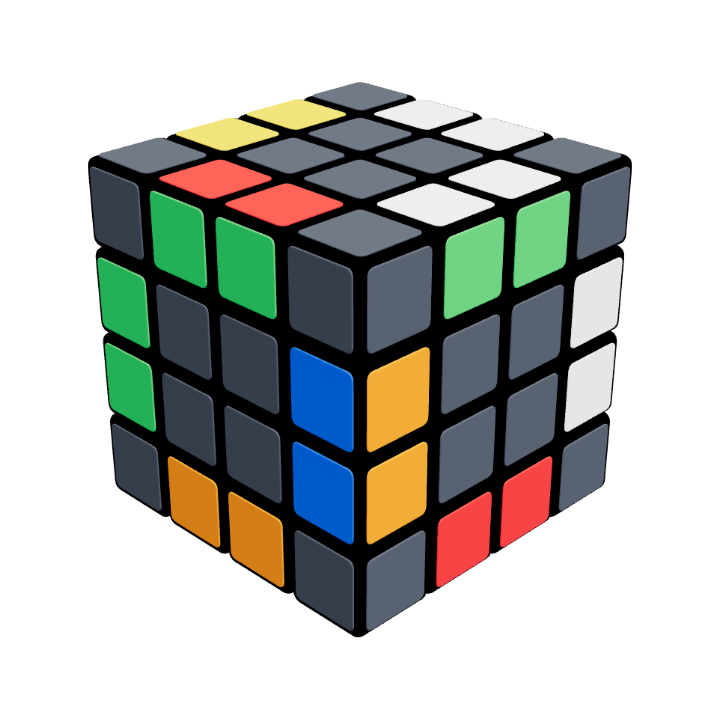
Your cube at this stage
All twelve edges paired
The two wings in each pair match on both faces, and the centres are restored. You can now solve the paired edges as you would on a 3×3.
Confirm these on your cube. Watching the animation alone does not complete the lesson.
Tick each item when you can do it yourself.